Grip
When you shoot, the first thing you do is pick up the pistol. If you are not holding the pistol correctly, you have little hope of shooting accurately. Why be frustrated and have a bad day at the range when it is easy to learn how to hold your pistol? The following will show you how to grip both a semi-automatic and a revolver.
|
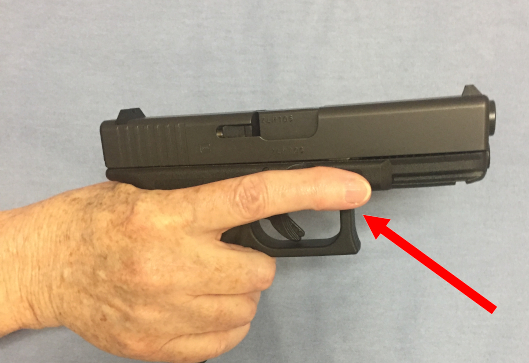
Step 1 GET A GRIP. First, when practicing your grip, make sure there is no magazine in the pistol and no round in the chamber. SAFETY – Your trigger finger should be outside the trigger guard, straight along the frame of the pistol below the slide (called indexing). |
|
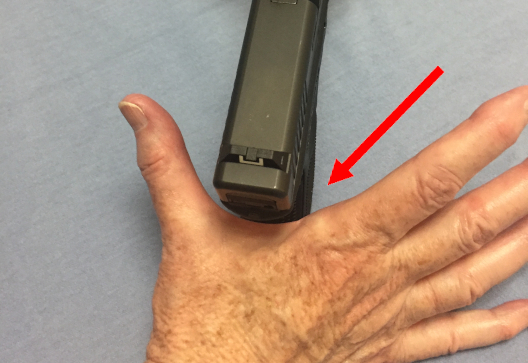
| The web of flesh between your thumb and forefinger should be pressed against the tang, or beavertail, of the pistol. This puts the bones of the forearm more in line with the action of the slide. The slide will be racked back by the explosion of gases as the cartridge fires. This is where you see the muzzle flip, or recoil. The higher up on the pistol your grip is, the more effectively you can counteract recoil to be on target for any following shots. |
|
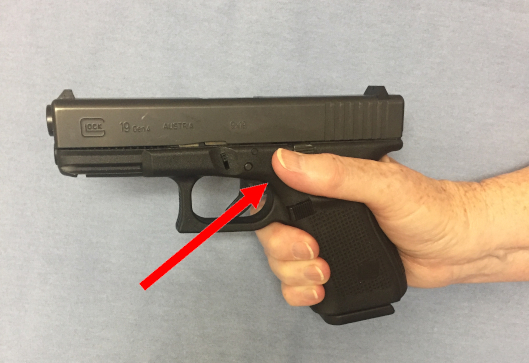
| The firing hand thumb should be lying along the frame just below the slide—if it creeps up to the slide, you may be hurt when the slide cycles. |
|
|
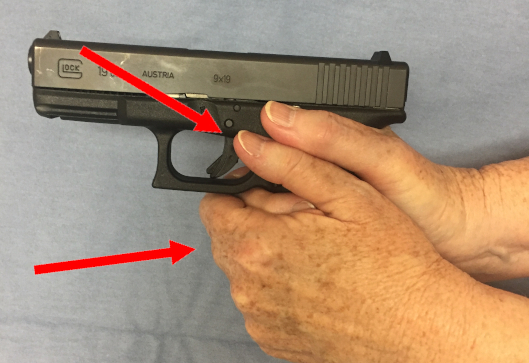
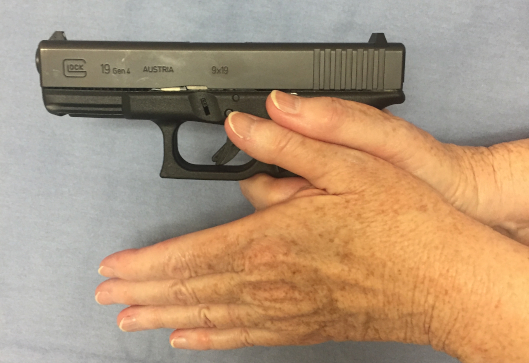
Step 2 SUPPORT IT. The meaty part of your support hand should be nestled into the open spot on the pistol grip. Your support hand fingers should wrap over the fingers of your firing hand, with the index finger pressed firmly against the bottom of the trigger guard. The support hand thumb should be lying alongside the firing hand thumb, pointing toward the target. |
|
| Once the support hand is in place, if you were to straighten out the support hand fingers, they would be pointing down at a 45° angle. |
|
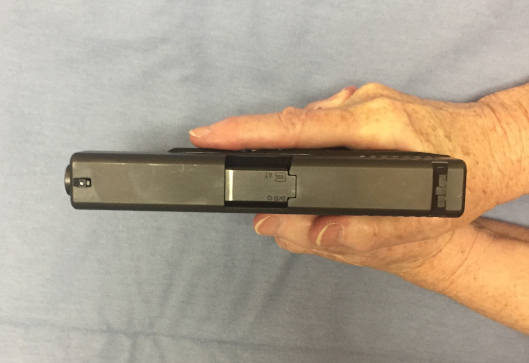
| If you look down from above, the thumbs and firing hand index finger will all be lined up along the pistol frame, and for many people the firing hand index finger and the support hand thumb will be almost lined up. Keep in mind everyone’s fingers are a little different! |
|
|
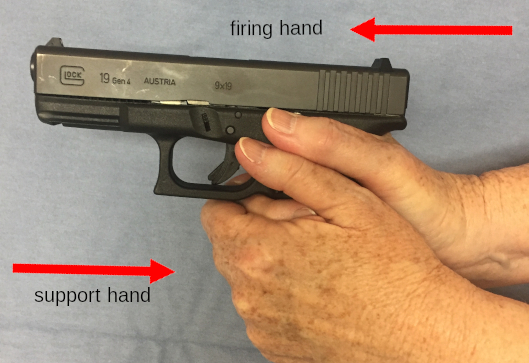
Step 3 SQUEEZE IT. Remember the Pushmi-Pullyu in Doctor Doolittle? That is a fun way to remember how to grip your gun. You apply isometric pressure to the grip by pushing forward with the firing hand, and pulling back with the support hand. Done correctly, this will give you a solid basis for shooting. |
|
| Another method is the wrist lockover. Firmly grip the pistol with both hands, then rotate the thumb sides of your wrists toward the pistol. This will tend to push your elbows outward. There are supporters and detractors of both methods – use the one that consistently works for you. | |
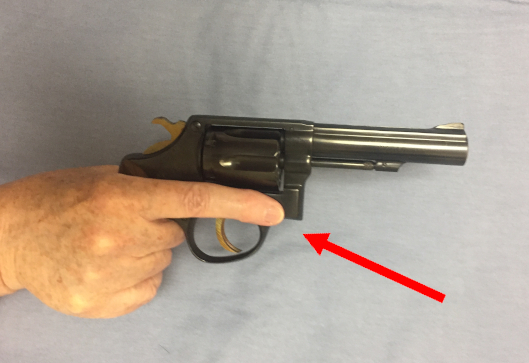
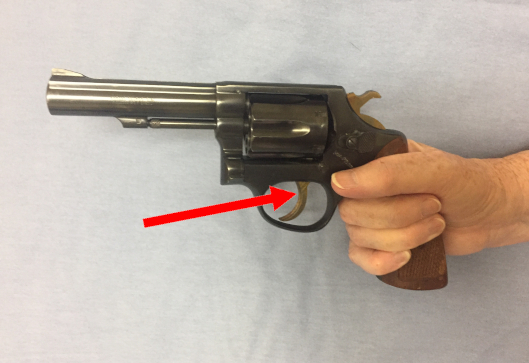
| The steps for your grip on a revolver are very similar. You will still index; this is a very important safety measure. Notice that your index finger is still on the frame of the pistol but below the cylinder. |
|
| The web of flesh between your thumb and your forefinger should be as high up as possible without getting in the path of the hammer. | |
| The firing hand thumb will be lying along the frame below the cylinder. When a revolver is fired, the explosive fire and gases will come out around the cylinder and you can be hurt if your thumb is on or directly behind it. |
|
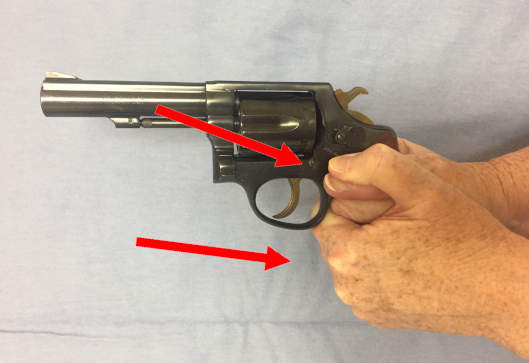
| Again, the meaty part of your support hand should be nestled into the open spot on the pistol grip and your support hand fingers should wrap over the fingers of your firing hand, with the index finger pressed firmly against the bottom of the trigger guard. The difference here is that your support hand thumb should be crossed over your firing hand thumb, to help keep both of them clear of the cylinder. |
|
| Once the support hand is in place, if you were to straighten out the support hand fingers, they would be pointing down at a 45° angle. | |
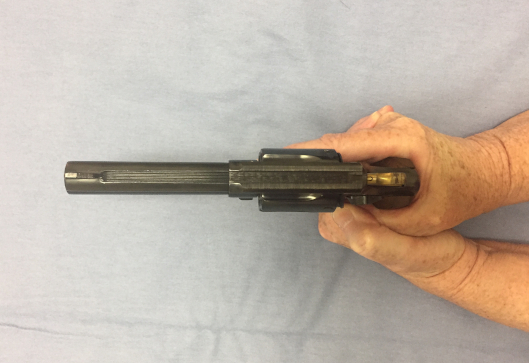
| Looking down from above, you will see the firing hand index finger below the cylinder, and the thumbs with the support hand thumb over the firing hand thumb. |
|
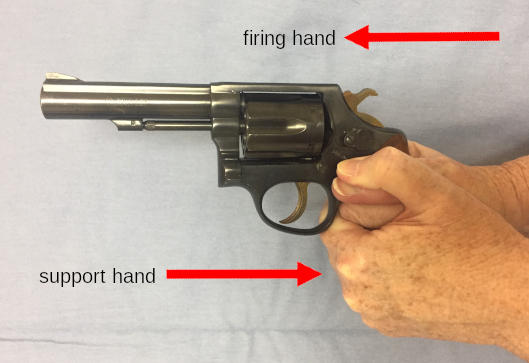
| Use the Pushmi-Pullyu method for your revolver, also. You apply isometric pressure to the grip by pushing forward with the firing hand, and pulling back with the support hand. Done correctly, this will give you a solid basis for shooting. |
|
